How to Fill a Vape Cartridge: Complete Guide (2026)

How to Fill a Vape Cartridge in 2026
Filling your own vape cartridges gives you complete control over what you vape — and saves real money compared to buying pre-filled carts. Whether you’re a DIY enthusiast loading up cartridges at home, a dispensary owner launching a branded line, or someone who just wants to use premium concentrates in a reusable cart, this guide walks you through every step.
In 2026, filling has evolved beyond the basic “unscrew and pour” method. New cartridge designs — postless, press-top, full ceramic — each require specific techniques. Get them right and you’ll fill perfect cartridges every time, with no leaks, no dry hits, and no wasted oil.
This guide covers everything: the right equipment, how to handle different oil viscosities (including thinning distillate when needed), exact filling steps for screw-top, press-top, and postless cartridges, and troubleshooting for the most common problems.
🛒 QUICK PICKS — Cart Filling Essentials:
→ Best Syringe ($2.89): 1ml Glass Distillate Syringe — luer-lock leak-proof, volume markings, blunt needle
→ Best Cart for Personal Use ($3.99): 1ml Ceramic Screw-On Cart — refillable 3-5+ times
→ Best for Thick Oils ($3.99): iKrusher AVAZ Pro Postless — bucket design for rosin and live resin
→ For Commercial Filling ($399.99): Oil Cartridge Filler Gun 50ml — 10x faster than syringes
Equipment You’ll Need
Before you start filling, gather the right tools. Proper equipment is the difference between a clean, precise fill and a sticky mess.
For Personal / DIY Filling
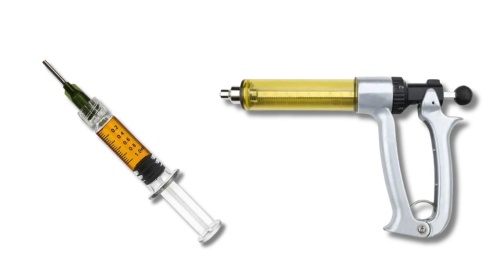
1. Distillate Syringe (Essential)
A precision syringe with a blunt-tip needle is your most important tool. Don’t try to fill a cartridge by pouring — you’ll waste oil and create a mess. A proper distillate syringe gives you:
- Pinpoint accuracy — hits the small fill area without spilling
- Clean operation — keeps oil contained in the syringe
- Reusable — clean with isopropyl alcohol between uses
- Affordable — starts at $2.89
- Volume markings — measure exactly how much oil you’re using
- Blunt needle — won’t puncture the cartridge or hurt you
- Leak-proof cap — safe to store filled syringes
2. Your Cannabis Oil or Concentrate
Any cannabis oil works: distillate, live resin, rosin, CO2 oil, or homemade extracts. Oil viscosity affects filling technique (covered below).
3. Heat Source (For Thick Oils)
Thick oils need warming to flow properly. Options ranked best to worst:
- Hot water bath — easiest, safest, most even heating
- Hair dryer — quick but uneven heating, use as backup
- Warming plate — professional option for consistent results
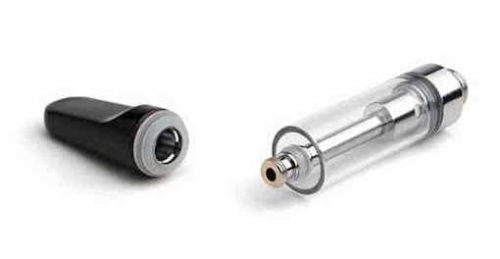
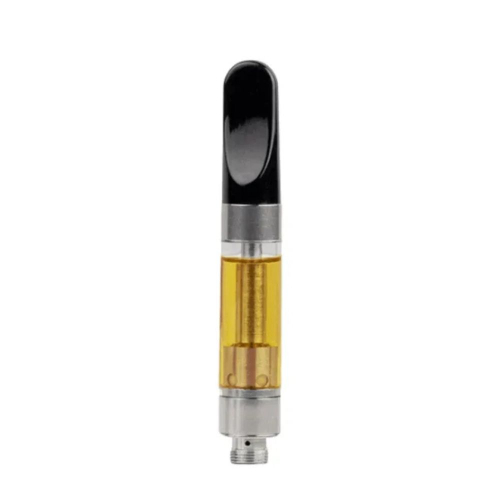
4. Empty Vape Cartridge
Choose the right cartridge for your oil type. See our Best Empty 510 Cartridge Guide for recommendations.
For Commercial / Dispensary Filling
If you’re filling multiple cartridges for resale, a cartridge filling gun dramatically speeds up the process. The 50ml reservoir holds enough oil for 50+ cartridges per load, and the precision trigger delivers consistent amounts every pull.
Benefits:
- Fill 10x faster than syringes
- Consistent fill levels (critical for product uniformity)
- 50ml capacity = fewer refills during production
- Precise trigger control = less waste
- Works with all oil viscosities
- Easy to clean and maintain
Know Your Cartridge Type Before You Fill
Not all cartridges fill the same way. Identifying your cartridge type before you start prevents costly mistakes. Here’s a quick comparison of the three main types:
| Cart Type | How to Identify | Refillable? | Best For |
|---|---|---|---|
| Screw-Top | Mouthpiece unscrews and screws back on | Yes (3-5+ times) | Personal use, DIY, beginners |
| Press-Top | Mouthpiece snaps on permanently | No (single-use) | Dispensaries, commercial filling, branded lines |
| Postless | No center post visible — “bucket” chamber | No (single-use) | Thick oils — rosin, live resin, premium concentrates |
Screw-Top Cartridges (Reusable)
The most forgiving option. Fill from the top after removing the mouthpiece, and you can reopen and refill 3-5+ times. Easiest type for beginners. Examples: 1ml Ceramic Coil Screw-On Cart, 2G Ceramic Screw-On Cart.
Press-Top Cartridges (Single-Use)
Fill from the top, then snap the mouthpiece on permanently. You get ONE chance to cap it (within 60-90 seconds), but the result is a tamper-evident seal — exactly what dispensaries need for branded products. Examples: iKrusher Calibr Pro, iKrusher TUX, iKrusher Karno.
Postless Cartridges (Special Instructions Required)
The bucket-style heating chamber holds oil directly against the heating element, which means thicker oils saturate evenly without clogging. The trade-off: postless carts require a flip-priming technique (covered below). Best for premium concentrates, rosin, and live resin. Examples: iKrusher AVAZ Pro Postless.
Understanding Oil Viscosity (And When to Thin Distillate)
Oil thickness dramatically affects how you fill your cartridge. Here’s the comparison:
| Oil Type | Consistency | Warming Needed | Cart Recommendation |
|---|---|---|---|
| Thin Distillate | Like water or vegetable oil, clear | None to minimal | Any cartridge type |
| Standard Distillate | Like honey, amber colored | 20-30 sec @ 120°F | Standard or postless |
| Live Resin / Rosin | Like peanut butter, dark amber/brown | 60-90 sec @ 130-140°F | Postless strongly recommended |
How to Thin Distillate for Cartridges
Search for “how to thin distillate” and you’ll find articles suggesting terpenes, MCT oil, PG/VG, or commercial thinning agents. Here’s the honest answer most guides don’t give you:
Most home users don’t need to thin distillate — they need to warm it. A 30-60 second hot water bath at 120-140°F makes virtually any distillate flow well enough to fill a cartridge without sacrificing potency or terpenes. That’s it. No additives.
When thinning is actually appropriate:
- Commercial production targeting a specific viscosity for a branded product
- Live resin or rosin formulation where adding a small amount of cannabis-derived terpenes brings flavor and viscosity to spec
- Crystallized distillate that won’t flow even with warming — but in that case, you’re rescuing the oil, not thinning it
What NOT to use to thin oil:
- Vitamin E acetate — implicated in EVALI lung illness cases. Never use this.
- PG / VG / PEG — these are e-juice carriers, not cannabis carriers. They produce harsh hits and questionable byproducts when heated with cannabis oil.
- Random MCT oil — dilutes potency dramatically and may produce lipid-related lung concerns when vaporized.
If you genuinely need to thin (commercial use): use cannabis-derived terpenes (CDTs) at 3-7% by weight, or food-grade botanical terpenes formulated specifically for vaporization. Anything else is a poor trade-off between flow and safety.
The home user takeaway: warm your oil to 120-140°F, fill your cart, skip the thinning agents. You’ll get better results and a safer product.
How to Fill Screw-Top Cartridges (Step-by-Step)
This is the most common filling method and works for most personal-use cartridges.
Step 1: Prepare Your Oil

If using thick oil, warm it first:
- Heat water to hot (not boiling) — about 120-140°F
- Place sealed oil container in hot water for 30-60 seconds
- Oil should flow like squeezable honey when ready
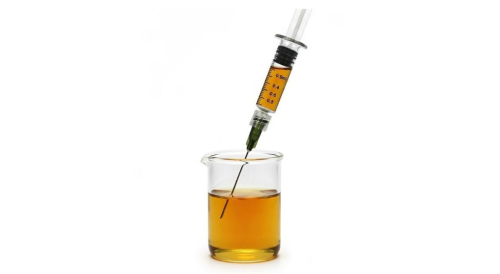
Step 2: Load Your Syringe
- Unwrap syringe from packaging
- Screw the blunt needle onto the syringe body
- Fully depress the plunger (push it all the way down)
- Insert needle tip into your warmed oil
- Slowly pull plunger upward to draw oil into the syringe
- Check volume markings — fill to about 0.9ml for a 1ml cartridge
Why 0.9ml and not 1.0ml? You need to leave an air gap at the top of the cartridge — more on that in Step 5.
Step 3: Open the Cartridge
- Unscrew the mouthpiece from the cartridge
- Set the mouthpiece aside in a clean spot
- You’ll see the tank with a center chimney (airflow tube) and the tank walls around it
Step 4: Fill Slowly and Carefully
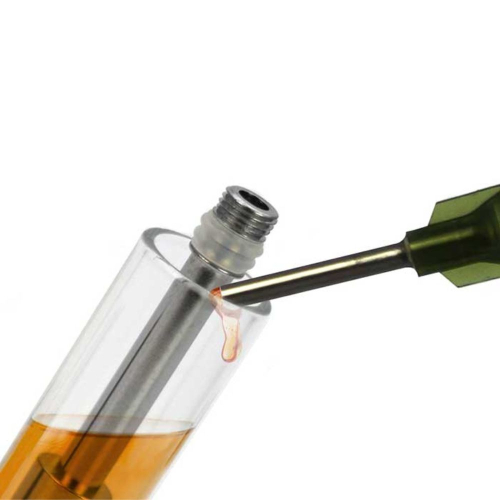
CRITICAL: Insert the syringe needle into the gap between the outer tank wall and the center chimney. Do NOT dispense oil into the center chimney — that’s the airflow path, and oil there will block draws.
- Position needle tip in the gap between wall and chimney
- Slowly press the plunger to dispense oil
- Fill gradually — don’t rush
- If oil is thick, give it time to settle into the tank
- Leave part of the opening uncovered so air can escape (otherwise bubbles form)
- Stop when oil reaches about 2-3mm below the top
Step 5: Leave the Air Gap
The air gap is essential for proper airflow and prevents leaks. Without it:
- Oil overflows when you attach the mouthpiece
- The cartridge may leak from pressure buildup during use
- Airflow gets restricted, leading to weak hits
Step 6: Reattach the Mouthpiece
- Screw the mouthpiece back onto the cartridge
- Hand-tight is enough — don’t over-tighten
- Wipe away any oil drips on the threads with a paper towel
Step 7: Prime the Cartridge (DON’T SKIP)
Before vaping, let the cartridge sit upright for 30-60 minutes. This allows:
- Oil to fully saturate the ceramic wick or coil
- Air bubbles to rise and escape
- The heating element to absorb oil completely
What happens if you skip priming? Dry hits, burnt taste, and potentially a damaged coil that ruins the cart. Always wait.
Step 8: Test and Vape
- Screw the cartridge onto your 510 thread battery
- Start at low voltage (2.8-3.2V) for the first hit
- Take a small test puff
- If it tastes good and produces vapor, you’re done
How to Fill Press-Top Cartridges (Step-by-Step)
Press-top cartridges fill the same way as screw-tops, but with critical timing differences.
The key difference: Once you snap the mouthpiece on, it’s permanent. You must cap within 60-90 seconds after filling (60 seconds for thin oils, 90 seconds for thick oils).
Steps 1-4: Same as Screw-Top
Follow the same process for preparing oil, loading syringe, and filling the cartridge.
Step 5: Work Quickly After Filling
Once you’ve filled the cartridge to the proper level (with 2-3mm air gap):
- Remove syringe immediately
- Have the mouthpiece ready in hand
- You now have 60-90 seconds before you must cap
Step 6: Snap the Mouthpiece On
- Align the mouthpiece with the cartridge opening
- Press down firmly and evenly
- You should hear or feel a click as it snaps into place
- Once snapped, it’s PERMANENT — you cannot remove it without destroying the cart
Step 7: Prime and Test
Same as screw-top — wait 30-60 minutes before vaping to allow proper coil saturation.
How to Fill Postless Cartridges (Special Flip Technique)
Postless cartridges like the iKrusher AVAZ Pro require a special priming technique because the oil sits directly on the heating element in a bucket-style chamber.
Steps 1-6: Standard Filling
Fill the postless cartridge the same way you’d fill any other cart (see screw-top instructions above).
Step 7: The Flip-Priming Technique
This is where postless carts differ. After capping:
- Flip cartridge UPSIDE DOWN (mouthpiece facing down)
- Let it sit upside down for 30 minutes
- Flip cartridge RIGHT-SIDE UP (mouthpiece facing up)
- Let it sit right-side up for 30 minutes
- Total priming time: 60 minutes minimum
Why this works: The bucket-style heating chamber needs gravity to help the oil saturate the ceramic element evenly from all sides. Flipping ensures complete saturation.
How to Warm Up Oil for Filling
Thick oils must be warmed before filling to flow properly. The warming method depends on whether you’re starting with oil in a jar or a pre-filled syringe.
Method 1: Warming Oil in Jars (Most Common for DIY)
Best for: DIYers buying distillate, rosin, or concentrates in small glass jars or containers.
Equipment needed:
- Hot plate or electric burner
- Small pot or beaker
- Water
- Thermometer (optional but helpful)
Step-by-step:
- Fill pot with water — enough to reach halfway up your oil container
- Heat water to 120-140°F — use medium-low heat. Water should be hot but not boiling
- Place sealed oil jar in hot water bath — keep the jar sealed so water can’t get in
- Wait 3-5 minutes — for thick oils like rosin, allow 5-10 minutes
- Test consistency — tilt the jar. Oil should flow like warm honey
- Draw into syringe immediately — remove jar from heat, open it, and draw oil while still warm
- Fill cartridges right away — oil will start cooling and thickening again within minutes
Temperature guidelines:
- Thin distillate: Room temperature to 100°F — often needs no heating
- Standard distillate: 110-120°F
- Thick rosin/live resin: 120-140°F
- Maximum safe temperature: 140°F — higher degrades terpenes
Method 2: Warming Pre-Filled Syringes
Best for: Dispensary-bought pre-filled distillate syringes, or syringes you’ve already loaded but need to re-warm.
Hot Water Bath for Syringes:
- Heat water to 120-140°F in a cup or small container
- Submerge the syringe body in hot water (keep the plunger end above water)
- Wait 30-60 seconds
- Remove syringe and dry the outside
- Test flow by gently pressing plunger
- Oil should now dispense smoothly
Hair Dryer Method (Quick Backup):
- Set hair dryer to low or medium heat
- Hold syringe 6-8 inches from the dryer
- Rotate syringe constantly for 30-60 seconds
- Don’t concentrate heat on one spot
- Test flow before filling
Caution: Hair dryers create uneven heating and hot spots. The hot water bath method is always safer and more consistent.
What NOT to Do
- Never use open flame — fire hazard and destroys oil
- Never use a microwave — uneven heating, dangerous, degrades oil
- Never exceed 140°F — damages terpenes and cannabinoids
- Don’t use boiling water — too hot, risks overheating oil
Troubleshooting Common Filling Problems
Problem: Oil Leaking from Bottom of Cartridge
Cause: Overfilling.
Solution: Always leave 2-3mm air gap at the top. Don’t fill past the max fill line. Use volume markings on the syringe to measure precisely.
Problem: Oil Won’t Flow from Syringe
Cause: Oil too cold or thick.
Solution: Warm syringe in hot water bath for 30 seconds. Work at room temperature (68-75°F minimum). For very thick oils, warm to 120-140°F.
Problem: Air Bubbles Blocking Oil Flow
Cause: Filled too quickly, or syringe covered the entire opening.
Solution: Tap cartridge gently on a table to release bubbles. Let it sit upright — bubbles will rise over time. Next time, fill slower and leave part of the opening uncovered.
Problem: Burnt Taste on First Hit
Cause: Didn’t prime long enough.
Solution: Always wait 30 minutes minimum (60 for postless). Check that oil has absorbed into the coil. For thick oils, wait 45-60 minutes. Take first hit at low voltage (2.8V).
Problem: Oil Pooling at Top, Not Absorbing
Cause: Coil needs more time to saturate, or oil is too cold.
Solution: Wait another 30 minutes. Gently warm the cartridge in your palm. Tap gently to encourage flow. Some oils take longer — be patient.
Problem: Oil Leaking from Mouthpiece
Cause: Overfilled or stored on its side.
Solution: Always store cartridges upright. Leave proper air gap when filling. Check for cracks in the cartridge. Make sure mouthpiece is fully secured.
Problem: Cartridge Tastes Harsh or Bad
Cause: Oil overheated during warming, or coil burnt from dry firing.
Solution: Never heat oil above 140°F. Always prime before first use. If coil is burnt, the cartridge may be ruined — for screw-top carts, you can try cleaning and refilling.
Commercial Filling: For Dispensaries & Brands
If you’re filling cartridges for resale, efficiency and consistency are critical. Here’s how to scale up.
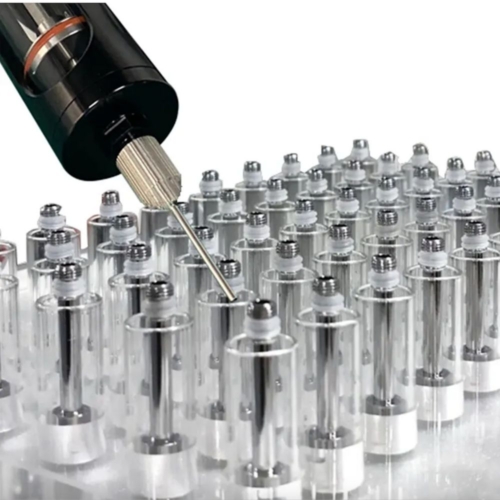
Use a Cartridge Filling Gun
Hand-filling with syringes works for 1-10 cartridges. Beyond that, a filling gun is essential.
Benefits of the Oil Cartridge Filler Gun:
- Speed: Fill 10x faster than syringes
- Consistency: Every cart gets the exact same amount
- Capacity: 50ml reservoir = 50+ carts without refilling
- Precision: Trigger control prevents overfilling
- Professional results: Perfect for branded products
How to use it:
- Fill the 50ml reservoir with your oil (warm if thick)
- Prime the gun by dispensing a small amount
- Position nozzle in cartridge opening
- Squeeze trigger to dispense precise amount
- Release trigger and move to next cart
- Repeat — 50+ carts in minutes
Best Practices for Commercial Filling
- Batch consistency: Use the same oil temperature for every cart in a batch
- Quality control: Weigh filled cartridges to verify consistent amounts
- Clean workspace: Keep filling area sterile and organized
- Label immediately: Mark batch numbers and fill dates
- Prime in bulk: Let filled carts sit for required time before packaging
- Use press-top carts: Tamper-evident seal reassures customers
Recommended Cartridges for Commercial Use
- iKrusher Calibr Pro — best value, reliable performance
- iKrusher TUX — professional finish, wholesale pricing
- iKrusher Karno Full Ceramic — premium positioning, zero metal contact
- iKrusher AVAZ Pro Postless — for premium rosin and live resin products
Safety Tips for Filling Cartridges
Cannabis oil is flammable and can be messy. Follow these guidelines:
Fire Safety
- Never use open flames to warm oil
- Keep oil away from heat sources when not actively warming
- Don’t smoke while filling cartridges
- Work in a well-ventilated area
- Keep a fire extinguisher nearby if filling commercially
Cleanliness
- Work on a clean, flat surface
- Have paper towels ready for spills
- Wipe up oil drips immediately
- Clean syringes with isopropyl alcohol after use
- Wash hands before and after filling
Oil Handling
- Never overheat oil (keep below 140°F)
- Store oil in cool, dark place
- Use fresh oil — old oil degrades and tastes bad
- Don’t mix different oil types in the same syringe without cleaning
Personal Safety
- Work in ventilated area — terpene vapors can be strong
- Blunt needles are safe, but still be careful
- Keep out of reach of children and pets
- Wear gloves if filling commercially or in large quantities
Cleaning and Reusing Screw-Top Cartridges
Screw-top cartridges can be refilled 3-5+ times with proper cleaning.
When to Clean
- Before switching to a different oil flavor or type
- When the cartridge is empty and you want to refill
- If you notice flavor degradation
Cleaning Process
- Remove any remaining oil
- Unscrew the mouthpiece
- Soak the entire cartridge in 90%+ isopropyl alcohol for 15-30 minutes
- Rinse thoroughly with warm water
- Shake out excess water
- Let dry completely (24-48 hours) — any water left will ruin your oil
- Once bone dry, ready to refill
Pro tip: Speed up drying by placing cartridges in front of a fan or in a warm (not hot) area.
Frequently Asked Questions
Q: How long should I wait before vaping after filling?
A: Minimum 30 minutes for standard cartridges, 60 minutes for postless cartridges. Thick oils may need 45-60 minutes. The wait allows the coil to fully saturate with oil.
Q: How do I thin distillate for cartridges?
A: Most home users don’t need to thin distillate — they need to warm it. A 30-60 second hot water bath at 120-140°F makes virtually any distillate flow well enough to fill, without compromising potency or terpenes. True thinning (adding terpenes, MCT, or other carriers) is reserved for commercial operations producing products at specific viscosities. See the “Understanding Oil Viscosity” section above for full guidance.
Q: Can I use a regular syringe from the pharmacy?
A: No. Medical syringes have sharp needles that can puncture cartridges and are dangerous. Always use blunt-tip distillate syringes designed for oil.
Q: How much oil fits in a 1ml cartridge?
A: About 0.9ml to leave proper air gap. Filling the full 1ml will cause overflow and leaks.
Q: Why does my cartridge leak after filling?
A: Usually overfilling. Leave 2-3mm air gap at the top. Also make sure you’re storing it upright and the mouthpiece is fully secured.
Q: Can I refill press-top cartridges?
A: No. Press-top cartridges seal permanently and cannot be opened without destroying them. Use screw-top cartridges if you want reusability.
Q: What temperature should I warm my oil to?
A: 120-140°F maximum. Higher temperatures degrade terpenes. Hot water bath is safest because water won’t exceed its temperature.
Q: Can I fill cartridges with homemade rosin?
A: Yes. Use postless cartridges for best results — rosin is very thick and clogs standard cartridges. Warm the rosin thoroughly before filling.
Q: Can I fill a cart with wax or resin instead of oil?
A: You cannot put raw wax or shatter directly into a 510 oil cartridge — the consistency is wrong and it will not vaporize properly. For wax concentrates, use a wax pen designed for that consistency. You can fill cartridges with rosin and live resin (which are thick but still flowable oils) — warm them well and use postless cartridges for best results.
Q: My oil is stuck in the syringe and won’t come out. What do I do?
A: Oil is too cold. Warm the syringe in hot water for 30-60 seconds. For very thick oil, you may need to warm longer or use hotter water (but stay below 140°F).
Q: How many times can I refill a screw-top cartridge?
A: Typically 3-5 times before you notice performance degradation. High-quality ceramic cartridges can sometimes be refilled more. Stop when you notice burnt taste or weak vapor.
Q: Is it normal for oil to darken in the cartridge over time?
A: Yes, oxidation causes slight darkening. This is normal and doesn’t affect quality unless the oil turns very dark brown or black (which indicates burning). See our Why Does Cart Oil Turn Dark guide for more.
Q: Can I mix different oils in the same cartridge?
A: Not recommended. Different viscosities don’t blend well and can cause clogging or uneven vaporization. Use separate cartridges for different oils.
Recommended Products for Filling Cartridges
Essential Filling Supplies
- For personal use: 1ml Glass Distillate Syringe — $2.89-$5.99
- For commercial use: Oil Cartridge Filler Gun — 50ml — $399.99
Best Empty Cartridges by Use Case
Personal / DIY (Reusable):
- 1ml Ceramic Coil Screw-On Cart — $3.99 (best value)
- 2G Ceramic Screw-On Cart — $3.99 (large capacity)
Thick Oils (Rosin / Live Resin):
- iKrusher AVAZ Pro Postless — $3.99 (best for thick concentrates)
Dispensaries / Commercial:
- iKrusher Calibr Pro — $2.99 (best value for commercial)
- iKrusher Karno Full Ceramic — $3.99 (premium positioning)
Browse all options: Shop empty 510 cartridges →
Cart Batteries to Complete Your Setup
Once filled, you’ll need a quality battery. Check out our 510 thread cart batteries collection, or read our guide on the Best Cart Batteries 2026.
📚 Continue Learning
Master every aspect of vaping with our comprehensive guides:
- → Best Empty 510 Cartridges 2026 — complete buying guide with product recommendations
- → Best Voltage for Vape Cartridges — optimize your settings for perfect hits
- → How Many Puffs Per Vape Cartridge — understand cartridge lifespan
- → Best Cart Batteries 2026 — pair your cart with the right battery
- → Cart Battery mAh Guide — choose the right battery capacity
- → Cartridge Care & Storage Guide — keep your filled carts fresh
🎯 Ready to Start Filling?
Free shipping on all orders over $40. Same-day dispatch on orders before 3pm EST.
What’s the easiest way to fill a vape cartridge for the first time? Use a 1ml glass distillate syringe with a screw-top cartridge — it’s the most forgiving combination. Warm your oil in a 120°F water bath for 30 seconds, draw 0.9ml into the syringe, unscrew the cart’s mouthpiece, dispense slowly into the gap between the outer wall and center chimney (never into the chimney), leave a 2-3mm air gap at the top, screw the mouthpiece back on, and let the cart sit upright for 30 minutes before vaping. That’s it.
These products are for adults 21+ only. Follow all local and state laws. Use responsibly, never drive impaired, and store safely away from children and pets.
Last Updated: May 2026

Written by James Smith
James is our Head of Vaping Community. He’s a crucial part of the Discount Vape Pen team — he listens to our customers and acts as the voice of the people. James is a proud advocate of CASAA, and a top online contributor on the Vaporents subreddit, Reddit’s largest flower vaping community.
Away from his keyboard, James will be listening to EDM music or walking his dog, Winnie. Meet all our Discount Vape Pen Authors here.